Tools and Techniques Required for Best Quality Window Tint Services
The cliché, the right tool for the job, holds especially true with receiving a quality window tint service as it does with anything else. The many tools required for high-quality window tint include ladders, application solutions, squeegees, knives, and more. The best way to demonstrate all that is necessary is to follow the process of having a professionally installed window film installed on your windows from start to finish. We will cover each step, including the tools and techniques utilized along the way.
Once you have decided that you could benefit from window film on your home or business and decided to call a professional window tint company, you will start by getting estimates. Companies should be easy to communicate with, show up on time, and bring samples to show you film options. During the estimate process, close measurements are taken with a tape measure so that you can be provided with the best estimate, reducing the waste as much as possible. Samples may be essential as window films have different color tones and darkness levels. Also, we like to leave customers with a piece of the film they chose so they can easily match the film later if necessary, perhaps if a window gets broken.
Quality Window Tint
While searching for a high-quality window tint, it is good to consider the size availability of the films. Most films come in various sizes that allow you to select rolls close to your window sizes, minimizing waste and helping to reduce costs. A few films come in minimal sizing options, which can cause issues. For example, if all your windows are 70″ x 70″, but the product you want comes in 60-inch width only, then every one of your windows would need a seam. Selecting a high-quality window tint available in 72-inch widths can eliminate the seams.
Now that you have chosen a quality window tint and a high-end window tint service provider, it is time to begin the installation process. Before installing any window film, you must protect any items, such as flooring, computers, etc., from the water required during installation with towels or blankets. Next, the installer precuts the window film for each window. Some companies will use an electric plotting machine to precut the window tint. Most companies use a film handler tool that holds the film and allows them to set blades at various widths to get close cuts. The installer may also cut the tint right out of the box in certain instances.
Some tools, such as ladders, scaffolding, or lifts, may be required on some projects but not needed on others. Other tools used only on specific applications may include levels, lasers, straight edges, or steamers.

Any time these are used, you should always use them correctly and according to the manufacturer’s safety guidelines.
Steps Involved to Install the Window Tinting
1. Next is one of the most crucial steps, cleaning the window to prepare for the window tint to be installed. You must remove as much dirt as possible from the frame and the glass, or it will end up beneath the tint. Clean the windows with soap (usually dish soap) and water in a spray bottle. If possible, a very sharp scraper and blade are used with soap and water to get any dirt or grime off the window. The blade should be stainless steel rather than carbon to reduce any chances of scratching the glass. Some glass is too sensitive even to use a blade on. In such cases, you will use a white scrub pad to loosen the grime. Once you separate the dirt from the glass, spray the window and use a squeegee to wipe the grime off the glass. Finally, you should also clean the frame. Depending on the frame type and how dirty it is, you may want to use a toothbrush to help clean them. Either way, a lint-free paper towel finishes the process by wiping away any dirty water from the frame and window seal.
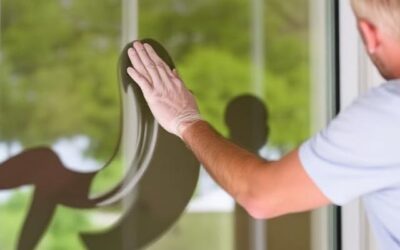
2. Now, you are ready to install your precut window film. Window films are like giant stickers, with a clear release liner that the installer removes to expose the film’s glue that will adhere the film to your glass. After removing the release liner, the installer sprays the window with soap and water, sometimes referred to as the application solution. This solution will allow the film to be moved around and positioned for installation. Also, it will make it possible to squeegee the water out in the next step.
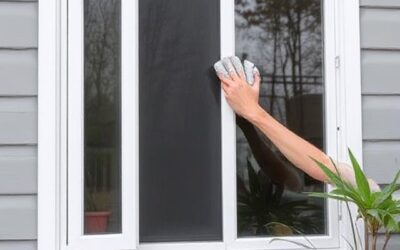
Many different squeegees can be used to squeegee the application solution out from under the film. Which squeegee you choose may depend on the type of film; some require softer, felt-covered squeegees, while others, like security window films, require a very sturdy squeegee to make it easier to get as much water out as possible. Sometimes the decision is made according to the preference of the experienced, professional window tint installer; each has their tool of choice. With whichever squeegee you choose, you systematically use an overlapping pattern to get all the water you can out.
3. After removing the water from under the film, you will use a knife and blade for a final trim. This blade should also be stainless steel to keep from scratching the glass. An installer will use a hard card, a thin metal or plastic trim tool, to leave a minimal gap between the window seal and the knife when cutting for the final time. This gap will allow the film to adhere and seal to the glass properly.

4. The final step in the process is to educate the customers on cleaning the window film to guarantee that it will not be damaged and will last for many years. For this, customers should use a soft cloth or non-abrasive paper towel to reduce the chances of scratching. Glass cleaners should be ammonia free to protect the high-quality window tint’s scratch-resistant coating and not damage the adhesive.
Conclusion
Now that you have a step-by-step, detailed guide to obtaining a high-quality window tinting installation, you can benefit from window film on your home or business today. When choosing a professional window tinting service provider, you know what to expect. Or, if you feel confident, you can acquire the proper tools for the job detailed above and follow the techniques to install your quality window tint yourself.
Stay tuned with Columbine Window!